The Complete Guide on How to Grow Jerusalem Artichokes
If you're looking for a productive, low-maintenance perennial crop that adds ornamental value and flavor to your garden, consider learning how to grow Jerusalem artichokes. Also known as sunchokes, Jerusalem artichokes (Helianthus tuberosus L.) are a species of sunflower with edible tubers that taste similar to water chestnuts when raw and have a nutty, earthy flavor when cooked. Their versatility in the kitchen, along with their hardiness in the garden, makes them a valuable addition to any homestead or backyard.
In this guide, we’ll cover everything you need to know—from choosing your tubers to planting, growing, harvesting, and storing. We'll also answer the most common questions gardeners have about this fascinating plant.

What Are Jerusalem Artichokes?
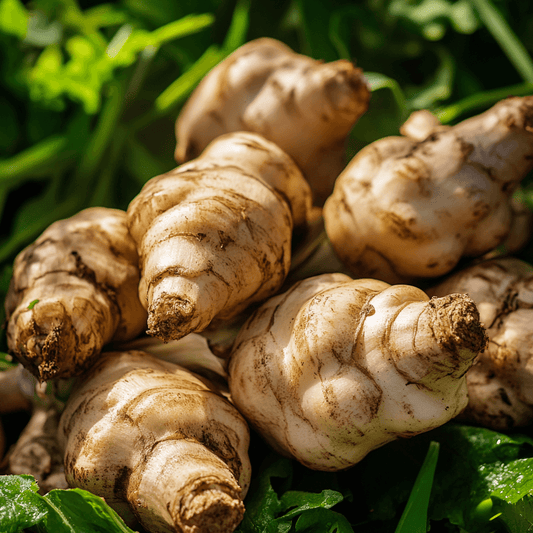
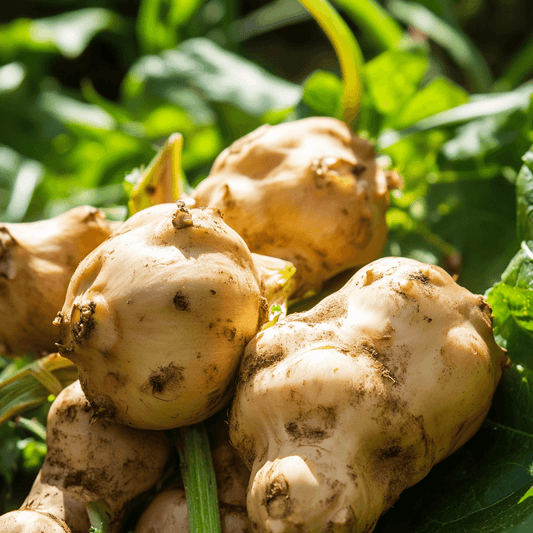
Jerusalem artichokes, or sunchokes, are native to North America and were cultivated by Indigenous peoples long before European settlers arrived. These sunflower relatives produce tall stalks with small yellow flowers and knobby tubers that resemble ginger root. The tubers can vary in color from creamy white to reddish-purple.
Jerusalem artichokes are not related to globe artichokes. Instead, they belong to the sunflower family. One of their most valuable traits is their ability to thrive in poor soil and cold climates. They're ideal for gardeners in USDA zones 3 through 8—the primary Jerusalem artichoke growing zone.
For home gardeners, Jerusalem artichokes offer:
-
Nutrient-rich tubers
-
A perennial harvest
-
Resistance to pests and disease
-
A beautiful ornamental plant for fencing or borders
You can find high-quality crowns and seeds here.

Why Grow Jerusalem Artichokes in Your Garden?
There are many reasons to grow Jerusalem artichokes:
-
Nutritional Benefits: The tubers are rich in inulin, a carbohydrate that converts to fructose in the digestive system. This makes them an excellent food for diabetics and those on a low-starch diet.
-
Low-Maintenance: Once planted, they come back year after year with minimal care.
-
Soil Improvement: Their robust root systems can help break up compacted soil and improve structure.
-
Dual-Purpose Plant: With ornamental flowers and edible tubers, you get both beauty and utility.
If you're looking to grow Jerusalem artichokes, you can purchase organic crowns from Peaceful Valley Farm & Garden Supply.
When to Plant Jerusalem Artichokes
The best time to plant Jerusalem artichokes is in late winter or early spring—as soon as the soil can be worked. For gardeners in colder climates, planting in early spring is essential for giving the tubers enough time to mature.
That said, planting Jerusalem artichokes in the fall is also an option in mild climates, allowing them to establish and emerge earlier in spring. However, fall planting requires well-drained soil to prevent rot.
If you're wondering how to plant Jerusalem artichokes, keep reading below.

Preparing and Planting Jerusalem Artichokes
Soil and Location
Jerusalem artichokes prefer loose, porous soil with good drainage and a sunny location. Though they tolerate poor soils, you’ll achieve better yields by enriching your soil with a high-phosphorus fertilizer, like Ultra Bloom 0-10-10.
Avoid planting them near garden beds with delicate crops—they can be invasive and spread aggressively. Many gardeners recommend dedicating a separate raised bed or planting them along a fence or border.
Cutting and Planting the Tubers
Here’s how to grow Jerusalem artichokes from crowns:
-
Cut larger tubers into 1–2 oz. pieces with 2–3 prominent buds (or "eyes"). Smaller tubers can be planted whole.
-
Space tubers 12–24 inches apart.
-
Plant 3–5 inches deep in well-drained soil.
-
Water thoroughly after planting.
For best results, plant them within a week of receiving your order. If you can’t plant right away, learn how to heel them in below.

Heeling In: Temporary Storage for Tubers
If your Jerusalem artichoke seedlings or crowns arrive before you're ready to plant, use the heeling in method to preserve their dormancy.
Outdoor Heeling In:
-
Dig a trench in a wind-protected area.
-
Place the tubers in the trench and cover them with soil or sand.
-
Gently tamp down to remove air pockets.
-
Keep the area moist.
Indoor Heeling In:
-
Use a root cellar, basement, or garage where temps stay between 38°F and 45°F.
-
Place tubers in a container filled with sand or moist soil.
-
Keep the tubers moist but not wet.
This method will prevent the crowns from drying out or breaking dormancy.
How to Grow Jerusalem Artichokes: Care and Maintenance
Watering
Jerusalem artichokes are drought-tolerant but will benefit from consistent watering, especially during dry spells. Water them like you would a sunflower.
Fertilization
Top-dress with compost mid-season, or side-dress with a high-phosphorus fertilizer from our collection to encourage tuber growth.
Weeding
Weed regularly when plants are young. Once established, the plants will shade out most weeds.
Harvesting Jerusalem Artichokes
Harvesting usually occurs after the first frost or when the flowers die back. Frost actually improves the flavor by converting inulin into fructose, resulting in sweeter tubers.
Steps for harvesting:
-
Cut back the stems.
-
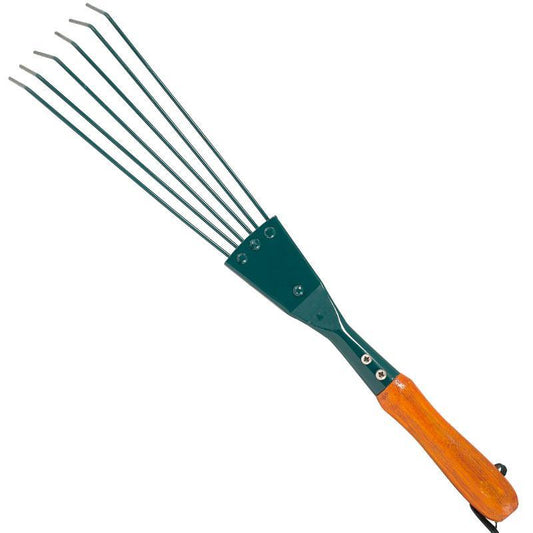
Use a hand rake to gently loosen the soil.
-
Dig carefully to avoid damaging the tubers.
You can leave tubers in the ground and harvest as needed throughout the winter, but be sure to remove all by early spring to prevent unwanted "volunteers."
Storing Your Harvest
Once harvested:
-
Scrub the tubers with a vegetable brush—no need to peel.
-
Store in high humidity near 32°F.
-
A root cellar or ventilated refrigerator drawer works well.
Properly stored, Jerusalem artichokes can last for several months.
Conclusion
Whether you're an experienced gardener or just starting out, Jerusalem artichokes are a rewarding and resilient addition to your landscape. They offer beautiful flowers, edible tubers, and low-maintenance perennial growth.
By learning how to grow Jerusalem artichoke properly and following best practices for planting, fertilizing, and harvesting, you can enjoy a steady supply of nutritious tubers for years to come.
Shop Jerusalem artichoke crowns, fertilizers, and gardening tools to get started with your sunchoke adventure today.
FAQs About Growing Jerusalem Artichokes
How long does it take for Jerusalem artichokes to grow?
Where is the best place to plant Jerusalem artichokes?
What is the secret to growing artichokes?
Can you grow Jerusalem artichokes in pots?
How do I plant artichokes?
How to store Jerusalem artichoke tubers for planting?
Can you grow Jerusalem artichoke from seed?
When is the best time for planting Jerusalem artichokes?
Related Guides & Articles
-
Jerusalem Artichoke Growing Guide
An in-depth PDF-style resource featuring detailed insights on planting, maintenance, and maximizing your harvest. (Grow Organic) -
Jerusalem Artichokes 101
A beginner-friendly overview—highlighting the plant’s unique qualities, health benefits, and quick-start tips. (Grow Organic) -
Jerusalem Artichokes: Managing Invasiveness in the Garden
Learn key strategies to keep these vigorous growers contained—from raised beds to harvesting methods that prevent unwanted spread. -
Companion Planting with Jerusalem Artichokes
Discover which vegetables and flowers thrive alongside sunchokes—and which are best kept separate. -
Container Cultivation of Jerusalem Artichokes
A step-by-step guide to growing these tubers productively in pots—ideal for limited spaces or controlled environments.
Explore & Shop
-
Jerusalem Artichoke Crowns Collection
Explore our selection of Jerusalem artichoke crowns—ready-to-plant tubers designed for successful propagation in your garden beds or containers.