Jerusalem artichokes, also known as sunchokes, are a hardy perennial vegetable and member of the sunflower family. Known for their edible, nutty-flavored tubers, they are easy to grow and make an excellent addition to your garden. Here’s a complete guide on planting, caring for, and harvesting Jerusalem artichokes.
Click here to access the complete Jerusalem Artichokes Growing Guide (PDF) for detailed information on soil preparation, planting, and long-term care.
What are Jerusalem Artichokes?
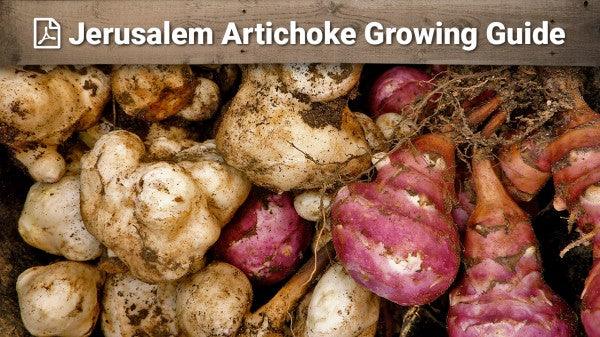
The Jerusalem artichoke (Helianthus tuberosus L.) is a perennial sunflower species grown for its edible tubers. These tubers, which taste similar to water chestnuts, can be eaten raw or cooked like potatoes. The plant produces bright yellow flowers and can grow over five feet tall, making it a beautiful and functional garden addition.
Best Growing Conditions for Jerusalem Artichokes
Soil and Sun Requirements:
Soil Type: Prefers porous, well-drained soil but can tolerate poor soils.
Sunlight: Requires full sun for optimal growth.
Climate: Thrives in cooler climates and is hardy through winter.
Invasiveness and Growing Location:
Jerusalem artichokes can be invasive, as any tubers left in the ground will sprout new plants in spring. To manage their spread:
Plant them in a raised bed or a dedicated area away from other garden beds.
Consider planting along a fence line or building to limit their spread.
How to Plant and Grow Jerusalem Artichokes
Heeling In Tubers (Before Planting):
If you can’t plant immediately after receiving the tubers, store them using the “heeling in” method:
Outdoors:
- Dig a trench twice as deep as the tubers.
- Place tubers in the trench, cover with soil or sand, and tamp down gently.
- Keep the soil moist to prevent drying out.
Indoors (Cold Storage):
Store tubers in a cool place (38°F to 45°F) such as a basement, garage, or root cellar.
Place them in a container with moist soil or sand.
Planting Jerusalem Artichokes:
- Timing: Plant in late winter or early spring as soon as the soil is workable.
- Soil Preparation: Add a balanced fertilizer high in phosphorus, such as a bulb or flower blend.
- Tubers: Cut large tubers into 1–2 oz pieces with 2–3 prominent buds. Small tubers can be planted whole.Spacing: Plant tubers 12–24 inches apart, covering them with 3–5 inches of soil.
Caring for Jerusalem Artichokes
Watering:
Water regularly, similar to sunflowers. During dry periods, keep the soil moist but not waterlogged.
Weeding:
Weed around young plants to prevent competition. Once established, the tall plants will shade out most weeds.
Fertilization:
Jerusalem artichokes are low-maintenance but benefit from organic compost or a balanced vegetable fertilizer during the growing season.
Harvesting Jerusalem Artichokes
When to Harvest: Harvest after the first frost for sweeter tubers. The starches convert to sugars after a frost, improving their flavor.
How to Harvest:
- Cut down the plant tops.
- Use a hand rake to dig up the tubers.
- Tubers dug later in the season are sweeter but lower in inulin.
Storage Tips:
Preparation: Scrub the tubers clean with a vegetable brush (no need to peel).
Storage Conditions: Store in high humidity near 32°F. Properly stored, they can last several months.
Nutritional and Health Benefits
Rich in inulin, a carbohydrate that converts to fructose, making it suitable for diabetics.
Low in starch, making it ideal for low-carb diets.
High in dietary fiber and essential minerals.
Common Questions About Growing Jerusalem Artichokes:
Are Jerusalem artichokes invasive?
Can I leave tubers in the ground over winter?
When is the best time to plant?
Related Articles & Growing Tips
Explore these focused articles to enhance your knowledge on specific aspects of growing Jerusalem artichokes:
-
How to Grow Jerusalem Artichokes: A Growing Guide
A hands-on walkthrough for planting, ongoing care, harvesting tips, and long-term storage strategies. -
Jerusalem Artichokes 101
A beginner’s primer explaining their unique characteristics, edible qualities, and quick-start advice. -
Managing Invasiveness in the Garden
Practical steps to keep these prolific growers in check—covering spacing, root barriers, and seasonal cleanup. -
Companion Planting with Jerusalem Artichokes
Learn which plants support or benefit from being planted alongside sunchokes—and which combinations to avoid. -
Container Cultivation of Jerusalem Artichokes
Ideal for gardeners with limited space—growing sunchokes in pots, including container choice, soil mix, and watering tips.
Shop Our Product Selection
-
Jerusalem Artichoke Crowns Collection
Browse our premium selection of planting-ready sunchoke crowns—perfect for starting your harvest-ready patch or container display.