Item Number: TM800
Sow at the Appropriate Time
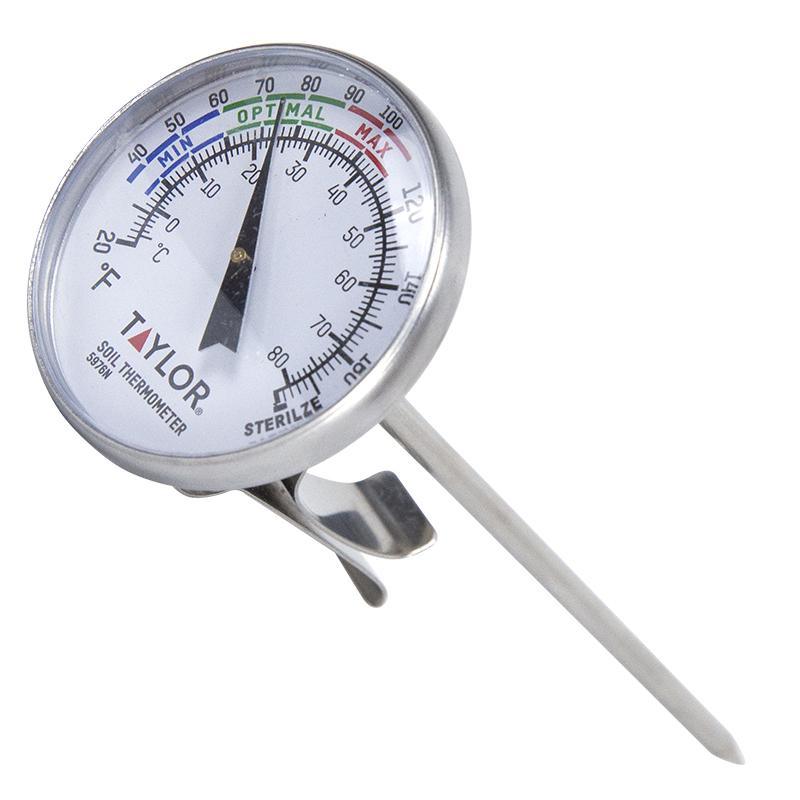
Monitor soil for optimum germination temperatures. Use to measure the temperature of soil mixes during sterilization or pasteurization as well.
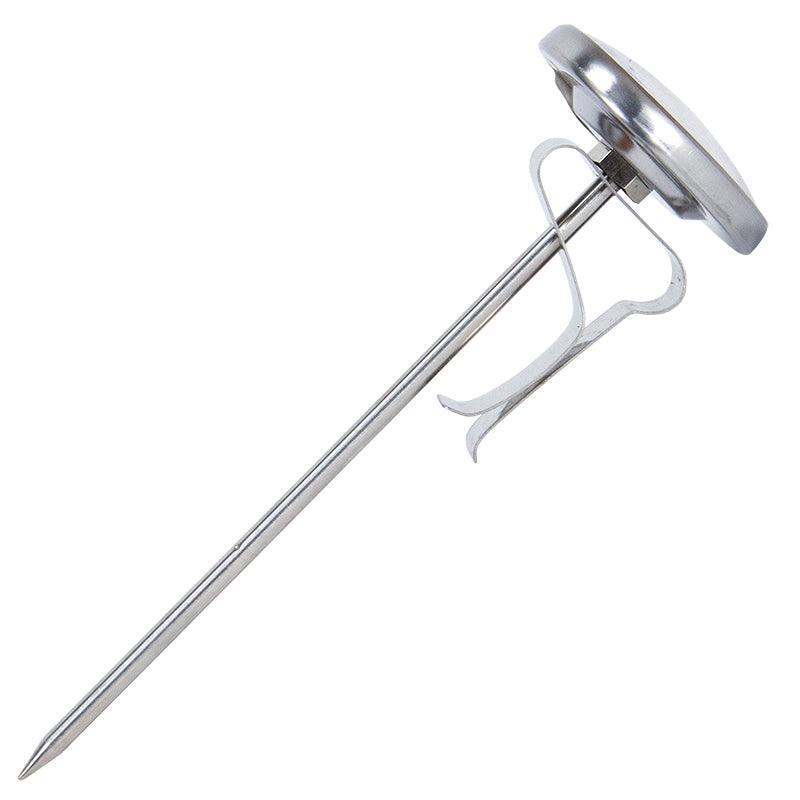
- Taylor dial with 5" probe.
- Readings from 20 to 180 degrees F.
- Avoid harmful diseases like pythium (damping off).
- Clip is included for securing to pots
How to Use the Soil Test Thermometer
Gardening success begins with understanding your soil's conditions. The Soil Test Thermometer is an essential tool for gardeners and farmers who want to optimize their planting schedules and ensure the best growing conditions for their crops. This guide will walk you through the steps of using the Soil Test Thermometer, ensuring you get accurate readings to help you make informed gardening decisions.
Why Soil Temperature Matters
Soil temperature is a crucial factor in seed germination, root development, and overall plant health. Different plants have varying temperature requirements for optimal growth. By monitoring soil temperature, you can:
- Determine the Best Planting Time: Knowing the right soil temperature helps you plant seeds when conditions are ideal, leading to better germination rates.
- Enhance Root Growth: Certain plants develop stronger root systems in specific temperature ranges.
- Prevent Plant Stress: Avoid planting when soil is too cold or too hot, which can stress plants and hinder growth.
Getting Started with the Soil Test Thermometer
1. Preparation
Before using the Soil Test Thermometer, ensure it is clean and in good working condition. Check the thermometer for any damage and clean the probe with a soft cloth to remove any debris or residue from previous use.
2. Choosing the Right Time
Soil temperatures can vary throughout the day. For the most accurate readings, take soil temperature measurements in the morning and late afternoon. This will give you a range of temperatures and help you understand the daily fluctuations.
3. Inserting the Thermometer
To get an accurate soil temperature reading:
- Select a Test Area: Choose a spot in your garden where you plan to plant. If you have multiple planting areas, take readings from each.
- Insert the Probe: Push the thermometer probe into the soil to the depth where your seeds or plants' roots will be. For most vegetables, this is about 2-4 inches deep. For deeper-rooted plants, insert the probe to the appropriate depth.
- Wait for the Reading: Leave the thermometer in the soil for about 3-5 minutes. This allows the probe to adjust to the soil temperature and provide an accurate reading.
4. Recording the Temperature
Once the thermometer stabilizes, read the temperature on the gauge. Record this temperature in a gardening journal or log. This record will help you track soil temperature trends and make informed planting decisions.
Using Soil Temperature Data
With the soil temperature data, you can:
- Plan Planting Schedules: Refer to seed packets or gardening guides to determine the optimal planting temperature for your crops. Plant seeds when the soil reaches the recommended temperature range.
- Monitor Seasonal Changes: Track how soil temperature changes with the seasons. This can help you plan for cool-season and warm-season crops.
- Adjust Mulching and Irrigation: Soil temperature can be influenced by mulching and watering practices. Use your thermometer readings to adjust these practices to maintain optimal soil conditions.
Maintenance and Care
To ensure the longevity and accuracy of your Soil Test Thermometer:
- Clean After Each Use: Wipe the probe with a damp cloth to remove soil particles.
- Store Properly: Keep the thermometer in a dry place, away from extreme temperatures and humidity.
- Check for Accuracy: Periodically check the thermometer’s accuracy by comparing it with a known temperature standard, such as an indoor thermometer or another reliable soil thermometer.
Using a Soil Test Thermometer, often referred to as a soil temperature gauge, is a straightforward but invaluable practice for any gardener or farmer. By regularly monitoring soil temperatures with an accurate soil thermometer or a digital soil thermometer, you can optimize planting times, improve crop health, and enhance overall garden productivity. Incorporate this simple tool, whether it's a garden soil thermometer or a soil temp probe, into your gardening routine to achieve better results and a more bountiful harvest. A planting soil thermometer and a soil temperature sensor are essential additions to your gardening toolkit.
Check Your Zone Compatibility:
Compatible with your zone.
Growing Zone for
Our Guarantee To You
Since 1976, we've served our customers at every stage of growing. Please contact us at any time. We are happy to support and assist you.
Description
Description
Monitor soil for optimum germination temperatures. Use to measure the temperature of soil mixes during sterilization or pasteurization as well.
- Taylor dial with 5" probe.
- Readings from 20 to 180 degrees F.
- Avoid harmful diseases like pythium (damping off).
- Clip is included for securing to pots
How to Use the Soil Test Thermometer
Gardening success begins with understanding your soil's conditions. The Soil Test Thermometer is an essential tool for gardeners and farmers who want to optimize their planting schedules and ensure the best growing conditions for their crops. This guide will walk you through the steps of using the Soil Test Thermometer, ensuring you get accurate readings to help you make informed gardening decisions.
Why Soil Temperature Matters
Soil temperature is a crucial factor in seed germination, root development, and overall plant health. Different plants have varying temperature requirements for optimal growth. By monitoring soil temperature, you can:
- Determine the Best Planting Time: Knowing the right soil temperature helps you plant seeds when conditions are ideal, leading to better germination rates.
- Enhance Root Growth: Certain plants develop stronger root systems in specific temperature ranges.
- Prevent Plant Stress: Avoid planting when soil is too cold or too hot, which can stress plants and hinder growth.
Getting Started with the Soil Test Thermometer
1. Preparation
Before using the Soil Test Thermometer, ensure it is clean and in good working condition. Check the thermometer for any damage and clean the probe with a soft cloth to remove any debris or residue from previous use.
2. Choosing the Right Time
Soil temperatures can vary throughout the day. For the most accurate readings, take soil temperature measurements in the morning and late afternoon. This will give you a range of temperatures and help you understand the daily fluctuations.
3. Inserting the Thermometer
To get an accurate soil temperature reading:
- Select a Test Area: Choose a spot in your garden where you plan to plant. If you have multiple planting areas, take readings from each.
- Insert the Probe: Push the thermometer probe into the soil to the depth where your seeds or plants' roots will be. For most vegetables, this is about 2-4 inches deep. For deeper-rooted plants, insert the probe to the appropriate depth.
- Wait for the Reading: Leave the thermometer in the soil for about 3-5 minutes. This allows the probe to adjust to the soil temperature and provide an accurate reading.
4. Recording the Temperature
Once the thermometer stabilizes, read the temperature on the gauge. Record this temperature in a gardening journal or log. This record will help you track soil temperature trends and make informed planting decisions.
Using Soil Temperature Data
With the soil temperature data, you can:
- Plan Planting Schedules: Refer to seed packets or gardening guides to determine the optimal planting temperature for your crops. Plant seeds when the soil reaches the recommended temperature range.
- Monitor Seasonal Changes: Track how soil temperature changes with the seasons. This can help you plan for cool-season and warm-season crops.
- Adjust Mulching and Irrigation: Soil temperature can be influenced by mulching and watering practices. Use your thermometer readings to adjust these practices to maintain optimal soil conditions.
Maintenance and Care
To ensure the longevity and accuracy of your Soil Test Thermometer:
- Clean After Each Use: Wipe the probe with a damp cloth to remove soil particles.
- Store Properly: Keep the thermometer in a dry place, away from extreme temperatures and humidity.
- Check for Accuracy: Periodically check the thermometer’s accuracy by comparing it with a known temperature standard, such as an indoor thermometer or another reliable soil thermometer.
Using a Soil Test Thermometer, often referred to as a soil temperature gauge, is a straightforward but invaluable practice for any gardener or farmer. By regularly monitoring soil temperatures with an accurate soil thermometer or a digital soil thermometer, you can optimize planting times, improve crop health, and enhance overall garden productivity. Incorporate this simple tool, whether it's a garden soil thermometer or a soil temp probe, into your gardening routine to achieve better results and a more bountiful harvest. A planting soil thermometer and a soil temperature sensor are essential additions to your gardening toolkit.
Shipping Information
Shipping Weight: 1.0 lb
Dimensions: 5.125"L x 1.75"W x 1.75"H
Features
Features
Characteristics
Characteristics
Use Instructions
Use Instructions
Useful Information
Useful Information
Guarantee
Guarantee
Share
Great way to monitor temps in containers. Small and simple and hopefully it will last me a long time.
Basic but sturdy, glad I finally got one as I've been finding beds on different sides of my house have quite different temps.
The easy read dial on this soil thermometer makes it easy to monitor the soil temperature to know the ideal time to plant seeds. The seed packets indicate the best soil temperature for good germination, and this soil thermometer lets me know when the soil has reached that temperature.
This is such a great tool to have in the garden. Direct seed in the garden when it is just the right temperature for the highest germination. A must have tool for the gardener.
Let customers speak for us
from 9203 reviewsI grow this in old litter boxes for a bunny & Guinea pig rescue- it is a great treat! Grows fast, thick and moist. I also grow it in my catio for my cats
High quality saffron corms that shipped when they said they would. They started sprouting in my cabinet within a week so definitely plant them quickly after receiving.
They looked good when the plants arrived. Waiting for planters to transplant so they'll have more room, but not planting in the garden to avoid the mint from spreading all over. They're still alive....
Beautiful seed garlic
This tree takes a lot of patience, both in years to fully fruit out and in terms of how late in the season the peaches finally ripen, - the end of September here in zone 5b, - but boy are they amazing when they come in! I have two other peach trees, - Redhaven and Reliance, which have wonderful fruit, but these Indian Free White peaches are amazing. The aroma alone is incredible. These also have thicker skins, more "fuzz," which you can rub off, and are a bit on the acidic side, but OH so yummy! I have gotten raves from the farmers who tried them.
Been using this for last couple growing season. Works wonders for the garden.
This hose gets dragged over bark and around raised garden beds, and also over concrete and a weedy hillside to water a couple trees. So far it has performed well and there aren't any leaks or kinks!
I have not had a chance to plant these yet as it’s still a little early. Package came quickly and garlic was beautiful, can’t wait to plant it.
This is a great addition to my veg garden area!
These branch supports work well, are sturdy, and relatively cheap. While you do have to provide your own poles, you can buy wooden or metal ones of your needed length at hardware or home improvement stores. We ordered ten at first and then bought ten more after seeing how the first ones worked.
Of course I wanted a hand made wooden trug, but they are expensive! This plastic one is easy to clean, and the perfect size. I love the drainage holes.
No lightweight nonsense here! These are the one of the industry standards in tree pots and they have become our go to on the tree farm. You will find lightweight look-a-likes out there, but most only serve one time use. These have held up for years and been used multiple times in some cases.
This has become one of my new favorites for all around propagation. From seeds to cuttings we use this mix for our fig trees and have had unbelievable success. The mix is formulated for strong and fast root development. No complaints about it!
These trays are great. Everything is ready to go.
I use them for cuttings and seed starting and haven't been disappointed yet.
I had the frustration of having my dog dig up my citrus trees and figs out of their containers. I was furious. This granular repellent has stopped the dog completely. So now, the dog can stay.