Skip to content
Quality Seeds, Plants and Growing Supplies Since 1976
USDA Growing Zone
GROW Rewards
Gift Cards
Commercial Pricing
Learning Center
My Rewards
My Account
Fruit & Nut Trees
Fruit & Nut Trees
Featured
Featured
All Trees
Bare Root Trees
Low Chill Trees
Multi-Graft Trees
Felix Gillet Institute Rare Trees
Stone Fruit Trees
Dwarf and Semi-Dwarf Trees
Potted Trees
Olive Trees
Citrus & Avocado Trees
Nut Trees
Popular
Popular
Almond Trees
Apple Trees
Apricot Trees
Avocado Trees
Fig Trees
Jujube Trees
Nectarine Trees
Plum Trees
Peach Trees
Pear Trees
Persimmon Trees
Pomegranate Trees
Bare Root Trees
Bare Root Trees
Apples Trees
Apricot Trees
Aprium Trees
Cherry Trees
Jujube Trees
Mulberry Trees
Nectaplum Trees
Nectarine Trees
Peach Trees
Pear Trees
Persimmon Trees
Pluerry Trees
Plum Trees
Pluot Trees
Walnut Trees
Potted Fruit & Nut Trees
Potted Fruit & Nut Trees
Almond Trees
Avocado Trees
Citrus Trees
Fig Trees
Olive Trees
Goji Berry Plants
Pomegranate Trees
All Potted Fruit Trees
Tree Planting Supplies
Tree Planting Supplies
Barriers
Growing Mediums
Shovels
Tree Planting Kits
Tree Maintenance & Care
Tree Maintenance & Care
Dormant Sprays
Fruit Tree Fertilizers
Fruit Tree Pest Control Products
Harvesting Equipment
Live Bees
Orchard Care Books
Pruning & Cutting Tools
Seasonal Plants & Flowers
Seasonal Plants & Flowers
Featured
Featured
All Seasonal Plants & Flowers
All Seed Garlic & Shallots
New Garlic Varieties
All Seed Potatoes
Mushroom Kits
Blueberry Plants
Strawberry Plants
Onion Sets
Flower Seeds & Bulbs
Popular
Popular
Hardneck Seed Garlic
Softneck Seed Garlic
Elephant Seed Garlic
Seed Shallots
Organic Seed Potatoes
Sweet Potato Slips
Flower Bulbs
All Berries
All Vines
Perennial Vegetable Crowns
Berries & Vines
Berries & Vines
Blackberries
Blueberries
Currants
Strawberries
Goji Berries
Gooseberries
Kiwi Vines
Raspberries
Table Grape Vines
Wine Grape Vines
Berry Planting Supplies
Perennial Plants
Perennial Plants
All Perennial Vegetable Root Crowns
Asparagus Crowns
Dragon Fruit Cuttings
Horseradish Crowns
Jerusalem Artichoke Crowns
Rhubarb Crowns
Bulbs
Bulbs
All Flower Bulbs
Fall Planted Flower Bulbs
Onions Sets
Spring Planted Flower Bulbs
Flower Bulb Planting Essentials
Seed Garlic
Seed Garlic
Seed Garlic
New Garlic Varieties 2025
Organic Garlic and Shallots
Elephant Seed Garlic
Hardneck Seed Garlic
Softneck Seed Garlic
Seed Shallots
Garlic Growing Essentials
Garlic Resource Center
Garlic Variety Selector Tool
Seeds Packs & Bulk
Seeds Packs & Bulk
Featured
Featured
New Seeds for 2026
All Seeds
Easy to Grow Seeds
Organic Vegetable & Flower Seeds
Flower Seeds
Herb Seeds
Bulk Seeds
Seed Spreaders
GIft Seed Tins
Popular
Popular
Tomato Seeds
Pepper Seeds
Bean Seeds
Beet Seeds
Bulk Herb Seeds
Cucumber Seeds
Carrot Seeds
Corn Seeds
Broccoli Seeds
Chard Seeds
Onion Seeds
Vegetable Seeds A-K
Vegetable Seeds A-K
Amaranth Seeds
Bean Seeds
Beet Seeds
Broccoli Seeds
Brussels Sprout Seeds
Cabbage Seeds
Carrot Seeds
Cauliflower Seeds
Celery Seeds
Chard Seeds
Corn Seeds
Cucumber Seeds
Eggplant Seeds
Seed Garlic
Greens Seeds
Kale Seeds
Kohlrabi Seeds
Vegetable Seeds L-Z
Vegetable Seeds L-Z
Lettuce Seeds
Leek Seeds
Melon Seeds
Okra Seeds
Onion Seeds
Parsnip Seeds
Pea Seeds
Pepper Seeds
Pumpkin Seeds
Quinoa Seeds
Radish Seeds
Seed Shallots
Sprouting Seeds
Squash Seeds
Tomatillo Seeds
Tomato Seeds
Turnip Seeds
Watermelon Seeds
Zucchini Seeds
Herb Seeds
Herb Seeds
Basil Seeds
Borage Seeds
Catnip Seeds
Chamomile Seeds
Chive Seeds
Cilantro Seeds
Dill Seeds
Fennel Seeds
Lavender Seeds
Marjoram Seeds
Mint Seeds
Oregano Seeds
Parsley Seeds
Rosemary Seeds
Sage Seeds
Tarragon Seeds
Thyme Seeds
Flower Seeds
Flower Seeds
Annual Flower Seeds
Perennial Flower Seeds
Sunflower Seeds
Wildflower Seeds
Pollinator-Loving Flowers
Cover Crop Seeds
Cover Crop Seeds
Featured
Featured
All Cover Crop Seed
Organic Cover Crop Seeds
Green Manure
Non-Legume Cover Crop Seed
Legume Seed
Meadow Grass Mix
Popular
Popular
Year Round Cover Crop Mixes
Summer Soil Building Seed
Inoculants
Cereal Grain Seed
Orchard & Vineyard
Lawn Alternative Seed
Good Bug Blends
Grass Seed
Grass Seed
Lawn Alternatives
Lawn Seed Mixes
Meadow Mixes
Native Grass Seed
Water-Wise Grass Seed
Specialty Cover Crop
Specialty Cover Crop
Cereal Grain Seeds
Dryland Pasture Seed Mixes
Erosion Control Seeds
Good Bug Blends
Irrigated Pasture Seed Mixes
Summer Non-Legume Cover Crops
Soil Building Mixes
Soil Building Mixes
Green Manure
Orchard & Vineyard
Summer Soil Building Seeds
Year Round Cover Crop
Year Round Cover Crop
Alfalfa Seed
Perennial Clover Seed
Growing Supplies
Growing Supplies
Featured
Featured
All Growing Supplies
Planting & Growing Containers
All-Purpose Fertilizer
Seed Starting Soil
Fruit Tree Fertilizers
Fertilizers for Trace Minerals
Soil Amendments
Organic & Natural Fertilizer
Bloom and Fruiting Fertilizer
Seed Starting Trays
Popular
Popular
New Gardener kits
Soil Block Makers
Acid-Loving Acidic Fertilizers
Calcium Fertilizers
Exclusive Peaceful Valley Products
High Potassium Fertilizer
Fertigation Fertilizer
Seed Starting
Seed Starting
Grow Lights
Heat Mats
New Gardener Kits
Plant Labels
Planting Containers
Seed Starting Soil
Seed Starting Trays
Soil Block Makers
Fertilizers & Growing Supplies
Fertilizers & Growing Supplies
Composting
Growing Mediums
Irrigation & Watering
Natural & Organic Potting Soil
Organic and Natural Fertilizer
Plant Support
Planting Containers
Propagation & Grafting Supplies
Soil Amendments & Testing
Frost & Sun Protection
Frost & Sun Protection
Agribon Floating Row Covers
Blackout Plastic
Frost Protection
Greenhouse Accessories
Greenhouse Supplies
Mini Greenhouses/Cold Frames
Snap Fittings and Fabric Clips
Shade Fabric
Sun Protection
Tools & Equipment
Tools & Equipment
Broadforks
Dibblers & Planters
Fruit Pickers
Garden Hoes
Harvesting Bags & Aprons
Harvest Baskets
Hand Weeders
Long-Handled Cultivators
Pruners
Trowels
Weed & Pest Mgt.
Weed & Pest Mgt.
Featured
Featured
All Weed & Pest Control
Live Bees
Natural Weed Killer
Beneficial Nematodes
Solarization Plastic
Predator Insects
Codling Moth Control
Popular
Popular
Insect Barriers
Biological Fungicides
Ladybugs
Pest Parasites
Pond Supplies
Repellents
Traps
Organic Weed Control
Organic Weed Control
Biodegradable Mulch
Natural Weed Killer
Mulching Plastic
Solarization Plastic
Weed Fabric
Beneficial Insects
Beneficial Insects
Beneficial Nematodes
Ladybugs
Live Bees
Pest Parasites
Predator Insects
Natural Pest Control
Natural Pest Control
Insect Barriers
Insect Deterrents
Insect Lures
Insect Traps
Insecticides
Neem Oil
Organic Fungicides
Organic Fungicides
Biological Fungicides
Botanical Fungicides
Mineral Fungicides
Oil-Based Fungicides
Annie's Annuals
Search
Seasonal Essentials
Bare Root Fruit Trees
Berries & Vines
Potted Trees
Cover Crop
Seeds
My Account
Log in
Fruit & Nut Trees
Featured
All Trees
Bare Root Trees
Low Chill Trees
Multi-Graft Trees
Felix Gillet Institute Rare Trees
Stone Fruit Trees
Dwarf and Semi-Dwarf Trees
Potted Trees
Olive Trees
Citrus & Avocado Trees
Nut Trees
Popular
Almond Trees
Apple Trees
Apricot Trees
Avocado Trees
Fig Trees
Jujube Trees
Nectarine Trees
Plum Trees
Peach Trees
Pear Trees
Persimmon Trees
Pomegranate Trees
Bare Root Trees
Apples Trees
Apricot Trees
Aprium Trees
Cherry Trees
Jujube Trees
Mulberry Trees
Nectaplum Trees
Nectarine Trees
Peach Trees
Pear Trees
Persimmon Trees
Pluerry Trees
Plum Trees
Pluot Trees
Walnut Trees
Potted Fruit & Nut Trees
Almond Trees
Avocado Trees
Citrus Trees
Fig Trees
Olive Trees
Goji Berry Plants
Pomegranate Trees
All Potted Fruit Trees
Tree Planting Supplies
Barriers
Growing Mediums
Shovels
Tree Planting Kits
Tree Maintenance & Care
Dormant Sprays
Fruit Tree Fertilizers
Fruit Tree Pest Control Products
Harvesting Equipment
Live Bees
Orchard Care Books
Pruning & Cutting Tools
Seasonal Plants & Flowers
Featured
All Seasonal Plants & Flowers
All Seed Garlic & Shallots
New Garlic Varieties
All Seed Potatoes
Mushroom Kits
Blueberry Plants
Strawberry Plants
Onion Sets
Flower Seeds & Bulbs
Popular
Hardneck Seed Garlic
Softneck Seed Garlic
Elephant Seed Garlic
Seed Shallots
Organic Seed Potatoes
Sweet Potato Slips
Flower Bulbs
All Berries
All Vines
Perennial Vegetable Crowns
Berries & Vines
Blackberries
Blueberries
Currants
Strawberries
Goji Berries
Gooseberries
Kiwi Vines
Raspberries
Table Grape Vines
Wine Grape Vines
Berry Planting Supplies
Perennial Plants
All Perennial Vegetable Root Crowns
Asparagus Crowns
Dragon Fruit Cuttings
Horseradish Crowns
Jerusalem Artichoke Crowns
Rhubarb Crowns
Bulbs
All Flower Bulbs
Fall Planted Flower Bulbs
Onions Sets
Spring Planted Flower Bulbs
Flower Bulb Planting Essentials
Seed Garlic
Seed Garlic
New Garlic Varieties 2025
Organic Garlic and Shallots
Elephant Seed Garlic
Hardneck Seed Garlic
Softneck Seed Garlic
Seed Shallots
Garlic Growing Essentials
Garlic Resource Center
Garlic Variety Selector Tool
Seeds Packs & Bulk
Featured
New Seeds for 2026
All Seeds
Easy to Grow Seeds
Organic Vegetable & Flower Seeds
Flower Seeds
Herb Seeds
Bulk Seeds
Seed Spreaders
GIft Seed Tins
Popular
Tomato Seeds
Pepper Seeds
Bean Seeds
Beet Seeds
Bulk Herb Seeds
Cucumber Seeds
Carrot Seeds
Corn Seeds
Broccoli Seeds
Chard Seeds
Onion Seeds
Vegetable Seeds A-K
Amaranth Seeds
Bean Seeds
Beet Seeds
Broccoli Seeds
Brussels Sprout Seeds
Cabbage Seeds
Carrot Seeds
Cauliflower Seeds
Celery Seeds
Chard Seeds
Corn Seeds
Cucumber Seeds
Eggplant Seeds
Seed Garlic
Greens Seeds
Kale Seeds
Kohlrabi Seeds
Vegetable Seeds L-Z
Lettuce Seeds
Leek Seeds
Melon Seeds
Okra Seeds
Onion Seeds
Parsnip Seeds
Pea Seeds
Pepper Seeds
Pumpkin Seeds
Quinoa Seeds
Radish Seeds
Seed Shallots
Sprouting Seeds
Squash Seeds
Tomatillo Seeds
Tomato Seeds
Turnip Seeds
Watermelon Seeds
Zucchini Seeds
Herb Seeds
Basil Seeds
Borage Seeds
Catnip Seeds
Chamomile Seeds
Chive Seeds
Cilantro Seeds
Dill Seeds
Fennel Seeds
Lavender Seeds
Marjoram Seeds
Mint Seeds
Oregano Seeds
Parsley Seeds
Rosemary Seeds
Sage Seeds
Tarragon Seeds
Thyme Seeds
Flower Seeds
Annual Flower Seeds
Perennial Flower Seeds
Sunflower Seeds
Wildflower Seeds
Pollinator-Loving Flowers
Cover Crop Seeds
Featured
All Cover Crop Seed
Organic Cover Crop Seeds
Green Manure
Non-Legume Cover Crop Seed
Legume Seed
Meadow Grass Mix
Popular
Year Round Cover Crop Mixes
Summer Soil Building Seed
Inoculants
Cereal Grain Seed
Orchard & Vineyard
Lawn Alternative Seed
Good Bug Blends
Grass Seed
Lawn Alternatives
Lawn Seed Mixes
Meadow Mixes
Native Grass Seed
Water-Wise Grass Seed
Specialty Cover Crop
Cereal Grain Seeds
Dryland Pasture Seed Mixes
Erosion Control Seeds
Good Bug Blends
Irrigated Pasture Seed Mixes
Summer Non-Legume Cover Crops
Soil Building Mixes
Green Manure
Orchard & Vineyard
Summer Soil Building Seeds
Year Round Cover Crop
Alfalfa Seed
Perennial Clover Seed
Growing Supplies
Featured
All Growing Supplies
Planting & Growing Containers
All-Purpose Fertilizer
Seed Starting Soil
Fruit Tree Fertilizers
Fertilizers for Trace Minerals
Soil Amendments
Organic & Natural Fertilizer
Bloom and Fruiting Fertilizer
Seed Starting Trays
Popular
New Gardener kits
Soil Block Makers
Acid-Loving Acidic Fertilizers
Calcium Fertilizers
Exclusive Peaceful Valley Products
High Potassium Fertilizer
Fertigation Fertilizer
Seed Starting
Grow Lights
Heat Mats
New Gardener Kits
Plant Labels
Planting Containers
Seed Starting Soil
Seed Starting Trays
Soil Block Makers
Fertilizers & Growing Supplies
Composting
Growing Mediums
Irrigation & Watering
Natural & Organic Potting Soil
Organic and Natural Fertilizer
Plant Support
Planting Containers
Propagation & Grafting Supplies
Soil Amendments & Testing
Frost & Sun Protection
Agribon Floating Row Covers
Blackout Plastic
Frost Protection
Greenhouse Accessories
Greenhouse Supplies
Mini Greenhouses/Cold Frames
Snap Fittings and Fabric Clips
Shade Fabric
Sun Protection
Tools & Equipment
Broadforks
Dibblers & Planters
Fruit Pickers
Garden Hoes
Harvesting Bags & Aprons
Harvest Baskets
Hand Weeders
Long-Handled Cultivators
Pruners
Trowels
Weed & Pest Mgt.
Featured
All Weed & Pest Control
Live Bees
Natural Weed Killer
Beneficial Nematodes
Solarization Plastic
Predator Insects
Codling Moth Control
Popular
Insect Barriers
Biological Fungicides
Ladybugs
Pest Parasites
Pond Supplies
Repellents
Traps
Organic Weed Control
Biodegradable Mulch
Natural Weed Killer
Mulching Plastic
Solarization Plastic
Weed Fabric
Beneficial Insects
Beneficial Nematodes
Ladybugs
Live Bees
Pest Parasites
Predator Insects
Natural Pest Control
Insect Barriers
Insect Deterrents
Insect Lures
Insect Traps
Insecticides
Neem Oil
Organic Fungicides
Biological Fungicides
Botanical Fungicides
Mineral Fungicides
Oil-Based Fungicides
Annie's Annuals
Item added to your cart
Continue shopping
Organic Gardening Tip of the Week
Preventing Blossom End Rot on Your Tomatoes and Peppers
How to choose the right garlic to grow
Tip of the Week
What are Garlic Scapes?
Harden Off Your Seedlings Before Transplanting Into the Garden
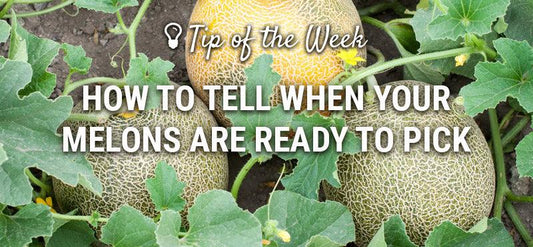
How to Tell When Melons are Ripe
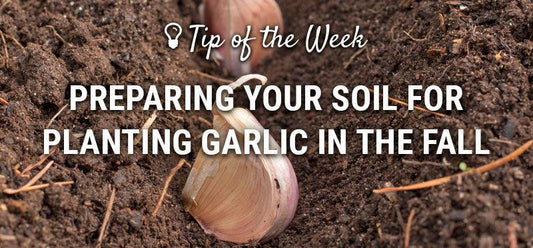
Preparing Your Soil for Planting Garlic
How to Improve Soil Biology
Tip of the Week: Growing Potatoes Using the Hugelkultur Method in a Smart Pot
More pages
1
2
3
4
5
…
8
Search Tip of the Week
Search
Organic Gardening
Growing Garlic Videos
Garlic Blogs
Organic Fruit & Vegetable Gardening
Organic Fruit & Nut Tree Care
Organic Herb Gardening
Growing Flowers & Succulents
Organic Fertilizing & Soil Health
Organic Weed, Pest & Disease Control
Frost & Sun Protection
Water Conservation
Landscaping & Garden Planning
Container Gardening
Tools & Gadgets
Ponds & Aquaculture
Organic Living
Harvesting
Food Preserving, Processing & Storage
Canning & Fermentation
Cooking & Baking
Cheesemaking
Home Brewing
Birds, Chickens & Livestock
Beekeeping
Health & Wellness
Crafts & Gift Ideas
Solar Power
Recipes
Soups
Breakfast
Desserts
Drinks
Hors d'Oeuvres
Entrées
Preserving
Salads
Side Dishes
Spreads, Dips, Sauces & Marinades
Downloads
Growing Guides
Solution Charts
Try Our Seed Planting Calculator!
Find Your Dates
Choosing a selection results in a full page refresh.
Opens in a new window.